blog
How to Configure Drupal with a MongoDB Replica Set

Drupal’s modular setup allows for different datastores to be integrated as modules, this allows sites to store different types of Drupal data into MongoDB. You can choose to store Drupal’s cache, session, watchdog, block information, queue and field storage data in either a standalone MongoDB instance or in a MongoDB Replica Set in conjunction with MySQL as the default datastore. If you’re looking at clustering your entire Drupal setup, then see this blog on how to cluster MySQL and the file system.
In this blog post, we are going to integrate our existing Drupal installation which runs on MySQL with a MongoDB Replica Set. We are running on Drupal 7, which is located under /var/www/html/drupal on server 192.168.50.200. It has been installed and configured with a MySQL server running on the same host and Drupal is running and accessible via http://192.168.50.200/drupal.
Our architecture looks like the following:

Deploying MongoDB Replica Set
- Use the MongoDB Configurator to generate a deployment package. In the wizard, we used the following values when configuring our replica set:
Configuration : Single Replicaset (primary + 2 secondaries) Vendor : Mongodb Inc Infrastructure : on-premise Operating System : RHEL6 - Redhat 6.x/Fedora/Centos 6.x/OLN 6.x Number of mongod in each replica set : 3 mongod OS User : root Use ‘smallfiles’? : yes Replica set name : my_mongodb ClusterControl server : 192.168.50.100 Mongo servers : 192.168.50.101 192.168.50.102 192.168.50.103 - Download the deployment script and start the deployment on the ClusterControl node:
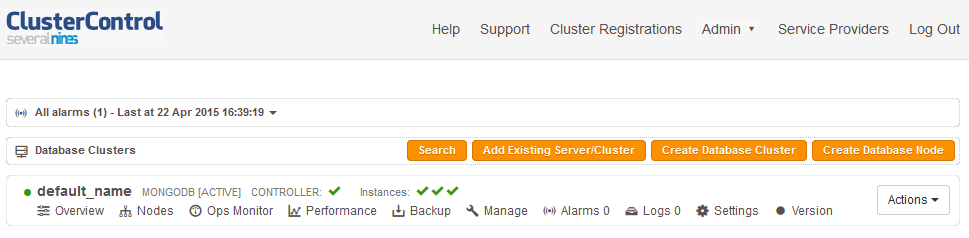
$ wget https://severalnines.com/mongodb-configurator/tmp/0o54tsvbtan8f1s2d6qrgm8rh0/s9s-mongodb-10gen-1.0.0-rpm.tar.gz $ tar -xzf s9s-mongodb-10gen-1.0.0-rpm.tar.gz $ cd s9s-mongodb-10gen-1.0.0-rpm/mongodb/scripts/install/ $ bash ./deploy.sh 2>&1 | tee cc.log - The MongoDB deployment is automated and takes about 15 minutes. Once completed, the ClusterControl UI is accessible at https://192.168.50.100/clustercontrol. Enter the default admin email address and password on the welcome page and you should be redirected to the ClusterControl UI database clusters list, similar to screenshot below:
Configure PHP MongoDB driver
The following steps should be performed on your Drupal server.
- The MongoDB module requires PHP MongoDB driver to be installed. Before we download and compile the driver, install the required packages:
$ yum install php-pear gcc openssl-devel -y - Install PHP MongoDB driver using pecl:
$ pecl install mongo
…
Build process completed successfully
Installing '/usr/lib64/php/modules/mongo.so'
install ok: channel://pecl.php.net/mongo-1.6.6
configuration option "php_ini" is not set to php.ini location
You should add "extension=mongo.so" to php.ini
** Accept the default option if prompted
- Add the following line in our PHP configuration, usually located at /etc/php.ini:
extension=mongo.so - Restart Apache web server to load the change:
$ service httpd restart - Verify the mongo driver is loaded correctly with PHP info and pecl list:
$ php -i | grep mongo
$ pecl list
INSTALLED PACKAGES, CHANNEL PECL.PHP.NET:
=========================================
PACKAGE  VERSION STATE
APC      3.1.9   stable
memcache 3.0.5   beta
mongo    1.6.6   stable
Installing Drupal MongoDB module
- Download the module for MongoDB 7.x-1.x-dev (under Development releases) from this page:
$ cd ~ $ wget http://ftp.drupal.org/files/projects/mongodb-7.x-1.x-dev.tar.gz $ tar -xzf mongodb-7.x-1.x-dev.tar.gz - Move the module directory into Drupal at drupal/sites/all/modules and ensure the web files have proper permissions:
$ mv ~/mongodb /var/www/html/drupal/sites/all/modules $ chown -Rf apache.apache /var/www/html/drupal/sites/all/modules/mongodb - Create a custom setting for MongoDB under the respective sites. In this case, we are creating it under default site:
$ vim /var/www/html/drupal/sites/default/local.settings.phpAnd add the following:
array( 'host' => '192.168.50.101,192.168.50.102,192.168.50.103', 'db' => 'drupal', // Database name. Mongodb will automatically create the database. 'connection_options' => array( 'replicaSet' => 'my_mongodb_0' ), ), ); include_once('./includes/cache.inc'); # -- Configure Cache $conf['cache_backends'][] = 'sites/all/modules/mongodb/mongodb_cache/mongodb_cache.inc'; $conf['cache_class_cache'] = 'DrupalMongoDBCache'; $conf['cache_class_cache_bootstrap'] = 'DrupalMongoDBCache'; $conf['cache_default_class'] = 'DrupalMongoDBCache'; # -- Don't touch SQL if in Cache $conf['page_cache_without_database'] = TRUE; $conf['page_cache_invoke_hooks'] = FALSE; # Session Caching $conf['session_inc'] = 'sites/all/modules/mongodb/mongodb_session/mongodb_session.inc'; $conf['cache_session'] = 'DrupalMongoDBCache'; # Field Storage $conf['field_storage_default'] = 'mongodb_field_storage'; # Message Queue $conf['queue_default_class'] = 'MongoDBQueue'; ?> - We need to apply the following workaround to allow the Drupal MongoDB module to write to the primary node, which in this case is 192.168.50.101.
$ sed -i 's|localhost|192.168.50.101|g' /var/www/html/drupal/sites/all/modules/mongodb/mongodb.module
$ sed -i 's|localhost|192.168.50.101|g' /var/www/html/drupal/sites/all/modules/mongodb/mongodb.drush.inc
Now, we are ready to activate the MongoDB module.
Activate the MongoDB module
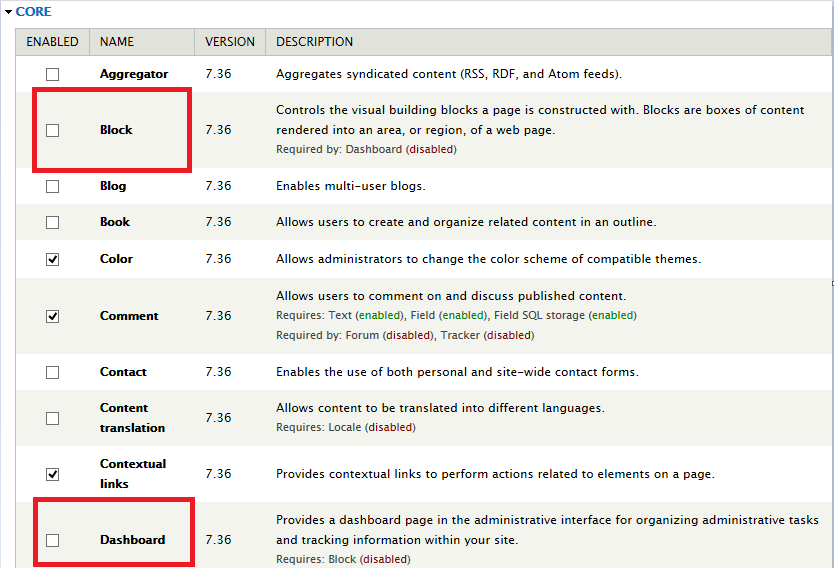
- From the Drupal administration page, go to the Modules page and disable the Dashboard and Block modules under Core:
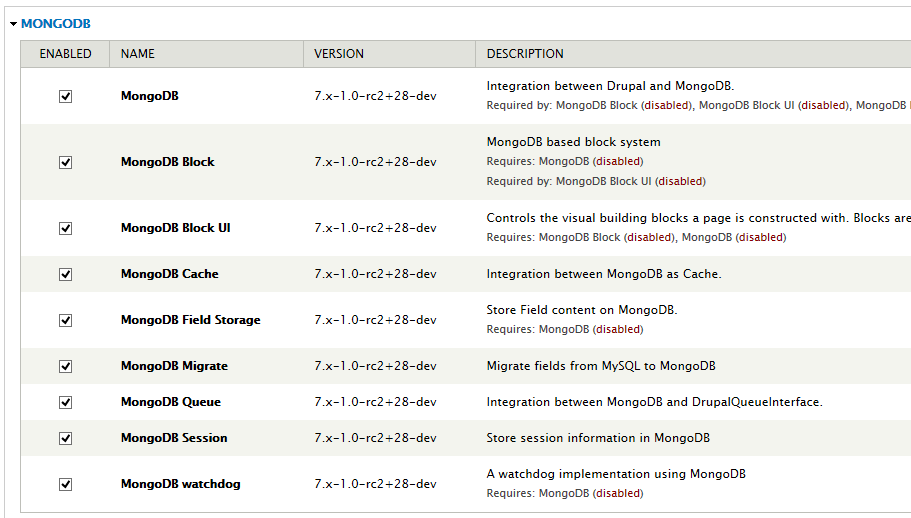
- Then, enable all the MongoDB related modules under MongoDB section:
Verify the deployment
On the primary node, enter mongo console and verify that the Drupal collections exist:
my_mongodb_0:PRIMARY> show dbs
my_mongodb_0:PRIMARY> show collections
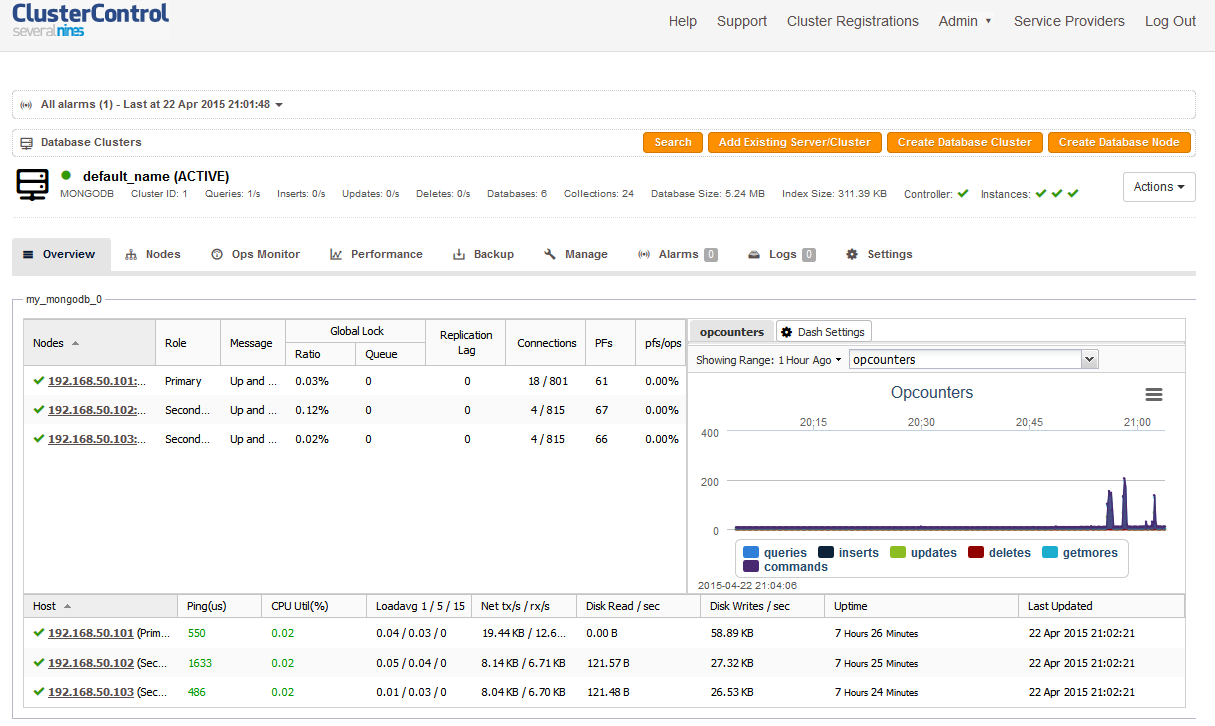
my_mongodb_0:PRIMARY> db.fields_current.node.find()You should see any database activity captured in the ClusterControl dashboard, as per the following screenshot:
When the primary goes down and another replica member takes over the primary role, manual intervention is required to perform the failover. Run the following command on the Drupal server to select a new primary:
$ sed -i 's|||g' /var/www/html/drupal/sites/all/modules/mongodb/mongodb.module
$ sed -i 's|||g' /var/www/html/drupal/sites/all/modules/mongodb/mongodb.drush.inc
** Replace the with the IP address of demoted node while with the newly promoted primary node.
That’s it! You are now running Drupal with MySQL and MongoDB replica set.